
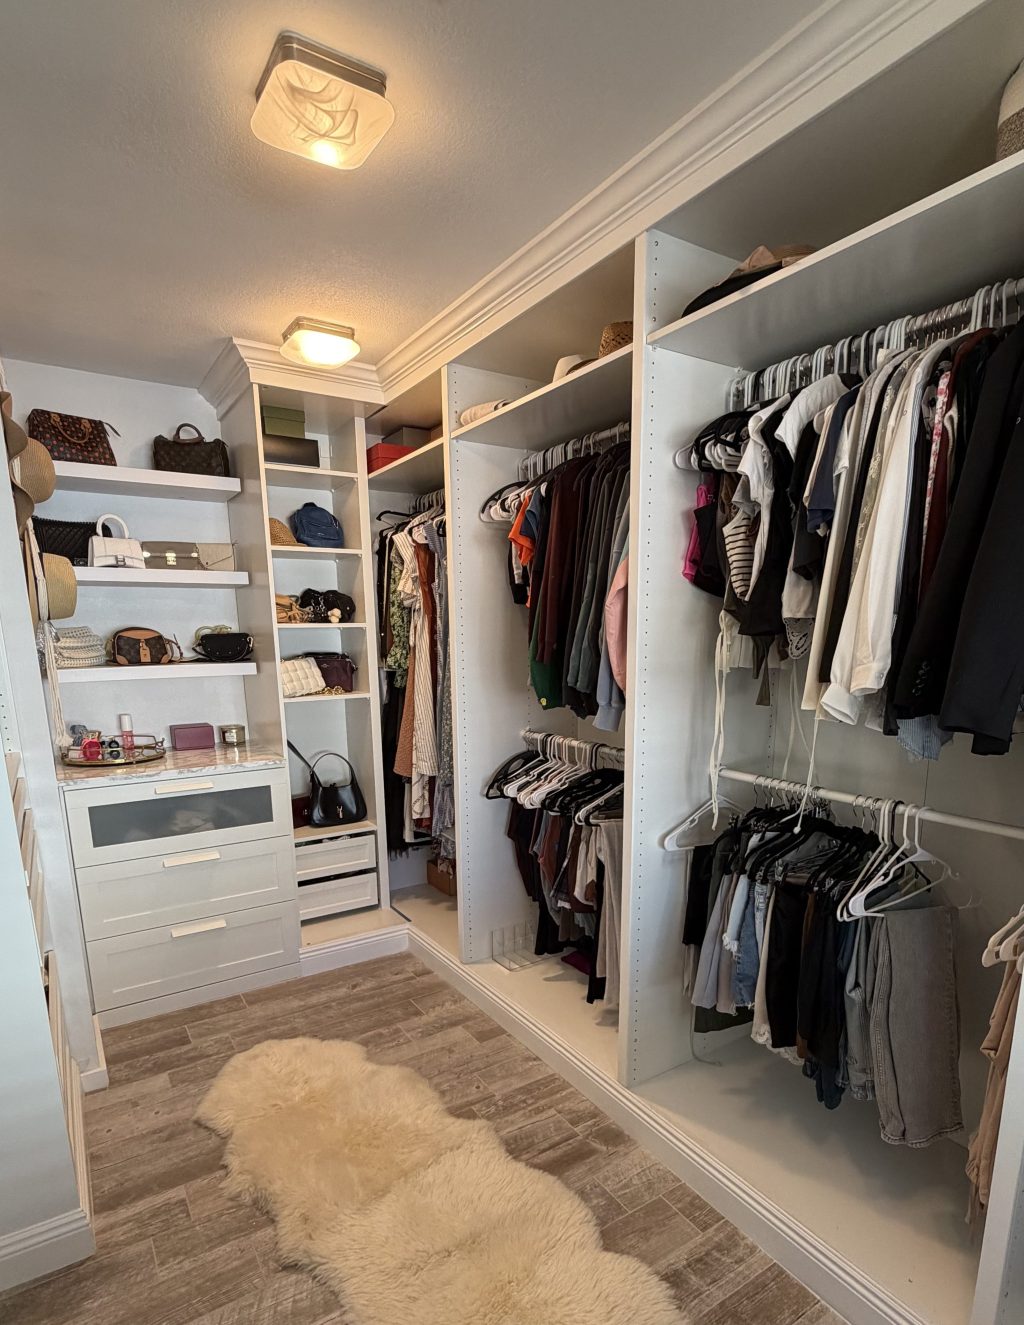
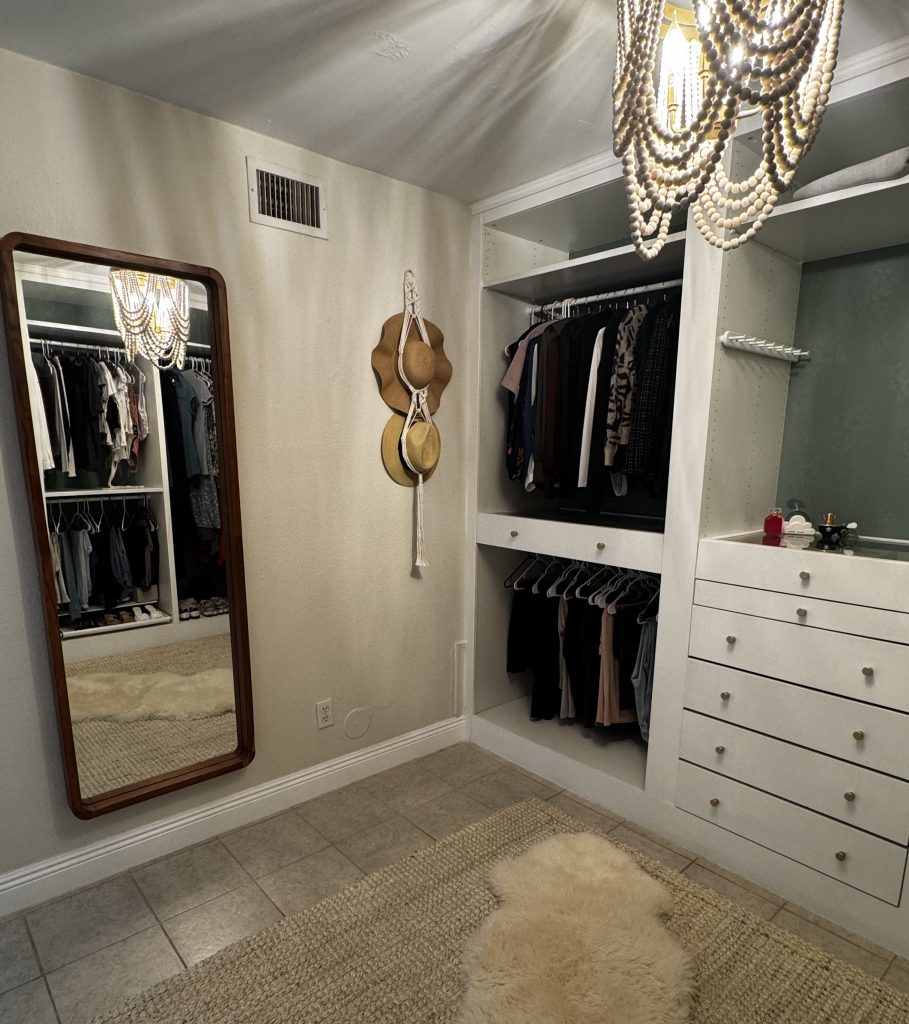
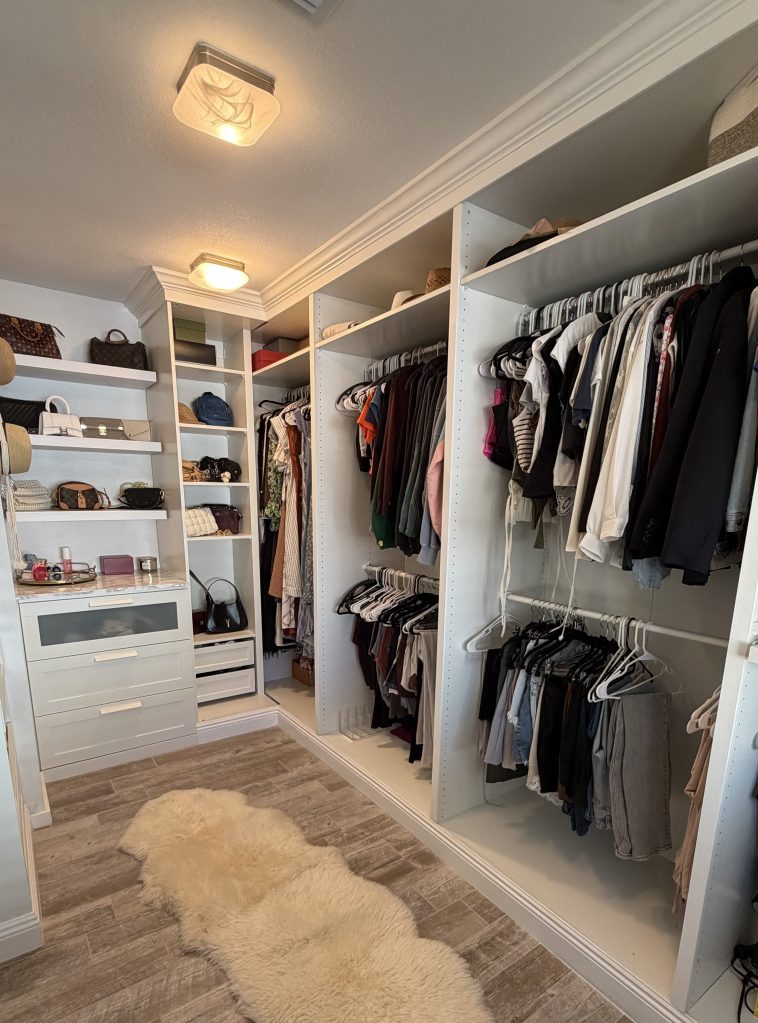
When I first moved into my condo I was fresh out of school, starting my new job, and very much on a budget. My little condo was perfect for me except one thing, it had the tiniest sliding door closet. In true Carrie Bradshaw fashion (yes, full Sex and the City energy), I decided the logical move was to turn the second bedroom into my dream closet. Practical? Maybe not. Necessary? Absolutely.
My vision was to make it look custom and expensive buttttt without actually being custom and expensive.
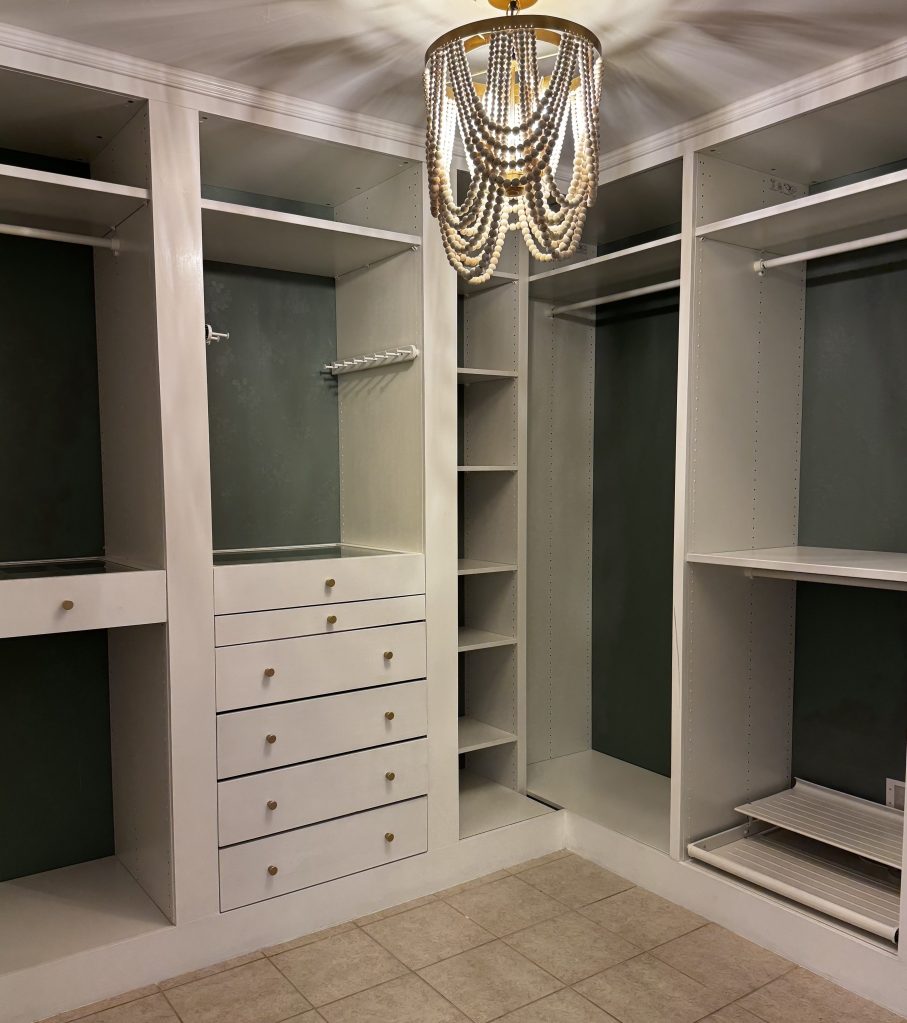
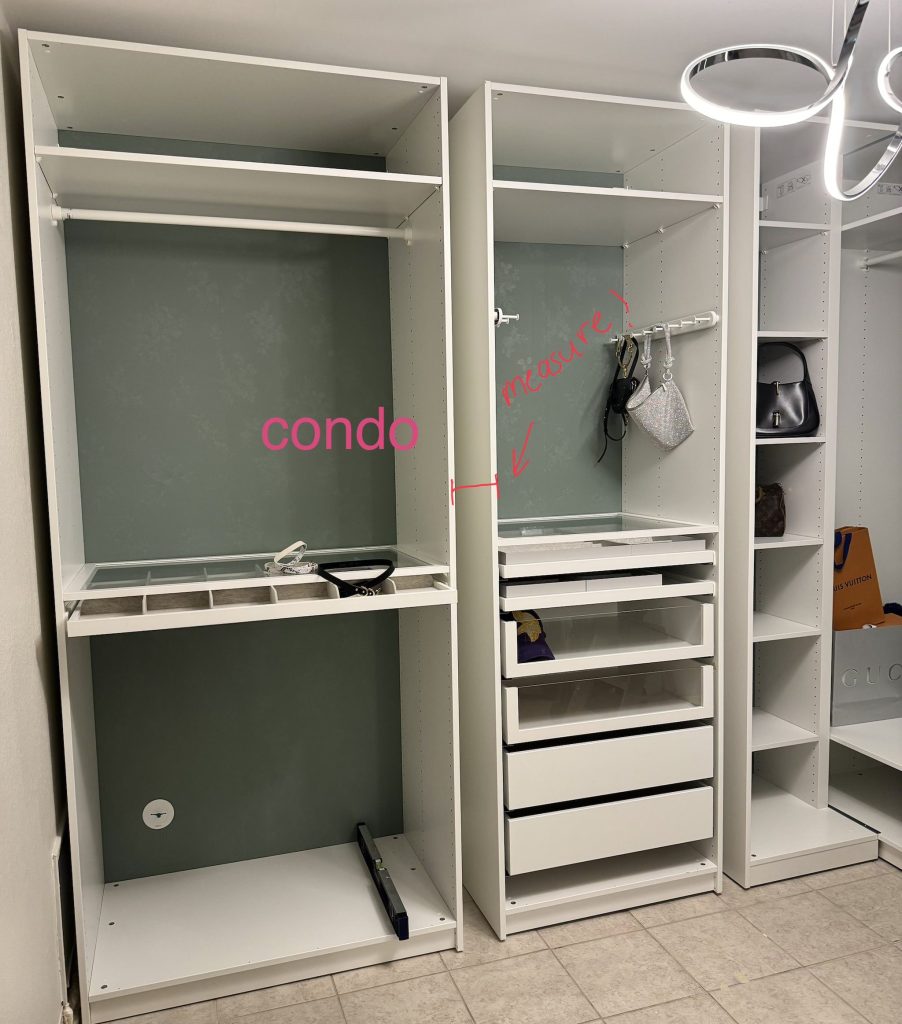
I’m not a handy girl. At all. But I figured it out (with a little help from my dad), and made mistakes so you don’t have to. In the end I ended up with a built-in closet that looks far more “designer” than the price tag suggests. If you want a boujee-on-a-budget closet you’ve come to the right place! In this post I’ll be showing you two different closets. One of them is from my condo, and the second is one I did at my house. Both were done slightly differently so regardless of how you move forward you should be

Planning Phase:
- Measure your room – take note of where any outlets are
- Decide if you’ll be removing your baseboards or not – it’s easier to remove them but I can show you how to do it if you don’t
- Design your layout – IKEA has a Pax planner tool on their website which makes designing very easy
Materials and Tools:
Tools:
- Circular saw for cutting baseboards and trim
- If you don’t have a circular saw, and don’t want to invest in one, get a mitre box. I used this for my first closet in my condo
- Paint brushes – for trim and baseboards
- Brad Nailer
- If you don’t have a nail gun you can always use liquid nails to glue the trim in place. I do suggest purchasing a nail gun, though, because you can use them in so many projects! It’s my favorite tool
- Trigger Clamps
- Measuring Tape
- Level
- Drill
- Stud Finder
Materials:
- PAX unit
- Molly anchors **only if installing without removing baseboards**
- 2” wood screws for base
- Crown moulding or trim – enough to go around your ceiling
- Baseboards – enough to go around the unit or the whole room (depending how you’re doing yours)
- Trim pieces – I’ll talk about how to measure these later
- 2×2’s – you will need these for your base and for the trim
- Paintable Caulk
- Hardware **if using**
- White trim paint – I used Sherwin Williams
Step-by-step guide
Step 1: Building the base
Whether you build a base depends mostly on your baseboard height.
The bottom platform of the PAX units is about 3” tall. So if your existing baseboards are 5”, you’ll need to build a 2” base for the units to sit on. That way, when you reinstall or wrap baseboards around them, everything lines up evenly and looks intentional. If you skip this step with taller baseboards, the proportions will look off.
The Mistake I Made
In my condo, I didn’t build a base.
My baseboards were too tall, so instead of raising the units properly, I added a shelf on the lowest rung inside each unit to visually lift everything. It looked fine, but it was a more expensive workaround because I had to buy an extra shelf for each PAX unit. If I did it again, I’d just build the base from the start (which is what I did in my house).
Learn from me! build the base.
How to Build the Base
Step 1: Measure the Bottom of Your Units
Measure the footprint (width and depth) of each PAX frame.
You can find your unit dimensions online. For reference, I used:
- Medium: 29 1/2” x 22 7/8”
- Large: 39 1/4” x 22 7/8”
Always double-check your exact model before cutting.
Step 2: Build a Frame Using 2x2s
- Cut 2×2 boards to match the footprint of your units.
- Screw them together to create a rectangular frame.
- Make sure everything is square before tightening fully.
You’re basically building a platform for the units to sit on.
Step 3: Secure the Base to the Wall
You can:
- Nail it into studs, or
- Drill and screw it directly into studs (better option for stability).
Make sure it’s level before installing the PAX units on top.
Important Note
If you are placing units directly side by side, build one continuous base that spans the full width.
If you’re leaving gaps between units (for filler panels or trim to create a wall-to-wall look), you’ll need to adjust your base dimensions accordingly. Don’t assume each unit base will be identical so plan the full layout first.
This will make more sense when I show the condo setup, but the key takeaway is:
Plan your spacing before you build your base.
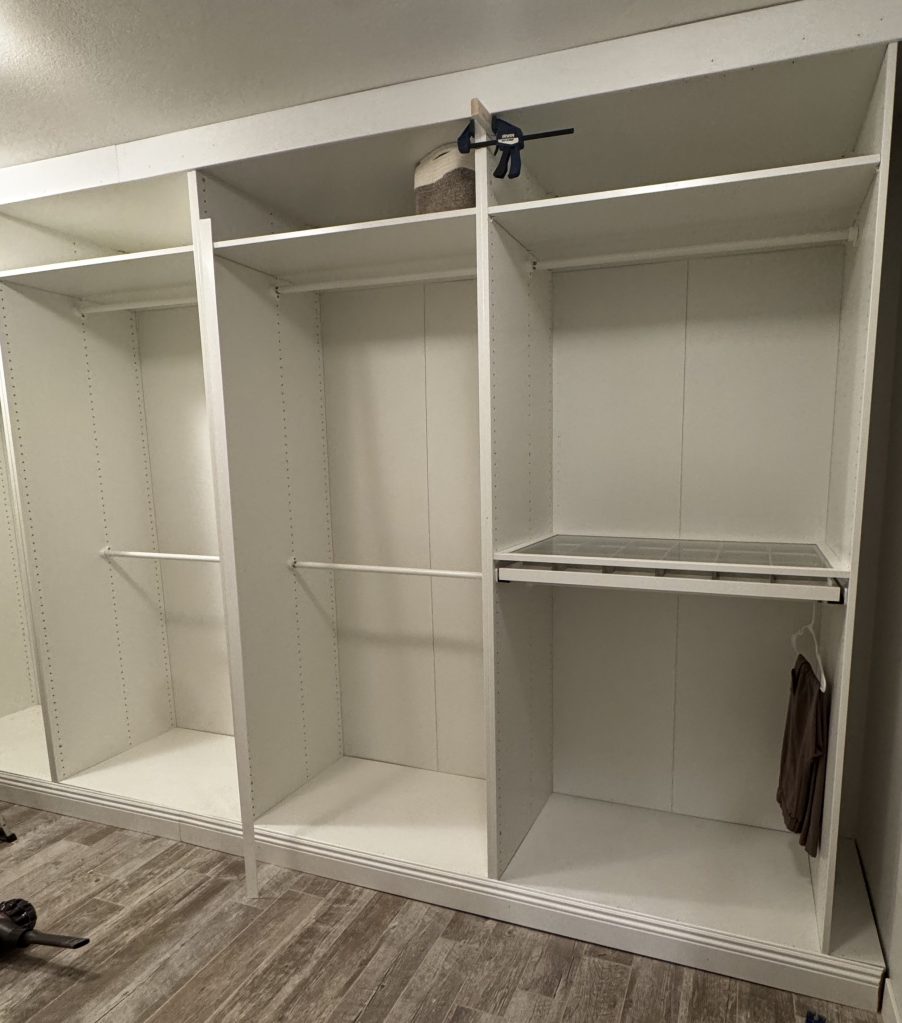
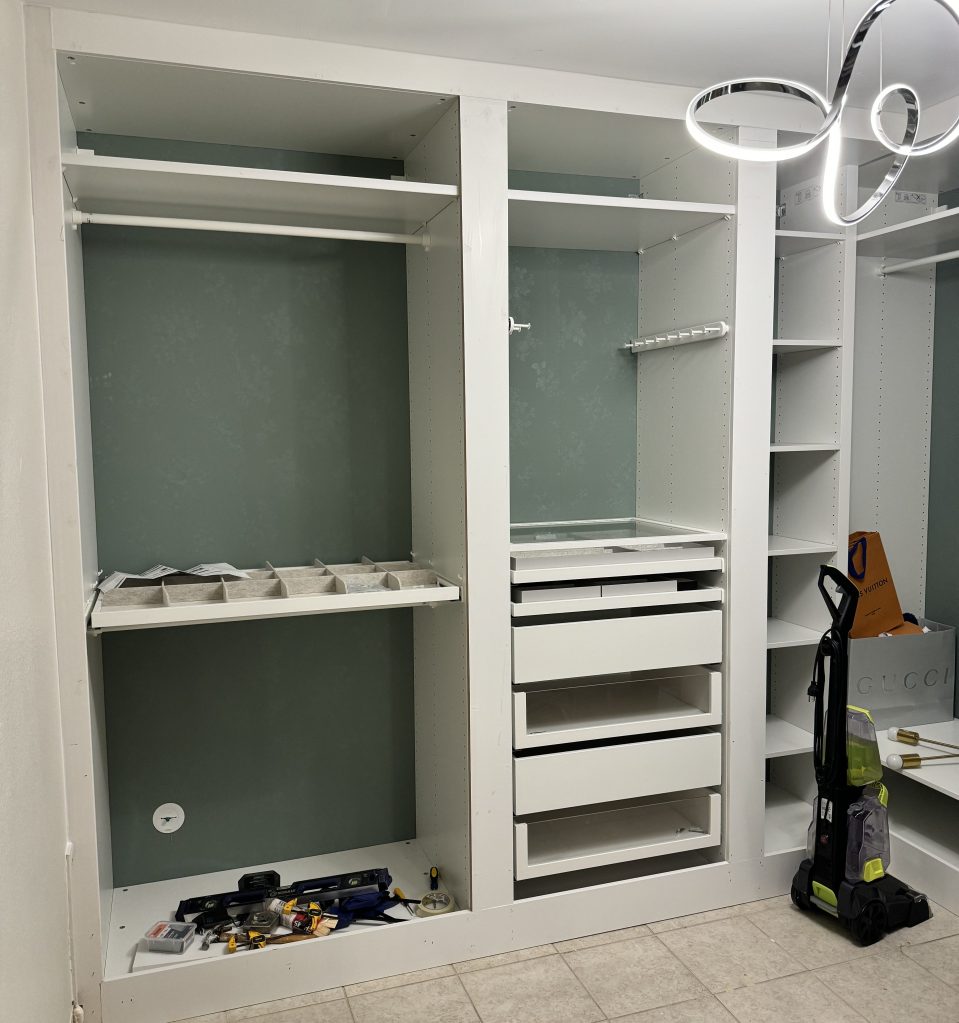
Step 2: Assemble the PAX Units
Assemble your PAX units according to the instructions provided by IKEA. Build them flat on the floor first, then stand them up once fully assembled.
Do not install the doors yet.
Leave doors, drawer fronts, and hardware off until the very end. It makes leveling, trimming, and painting much easier.
If You Plan to Paint
I personally did not paint my units. But if you’re planning to paint yours, do it before assembling them. It’s much easier to sand and prime flat panels. There are great resources online on how to paint laminate. The most important thing is using a good primer. I recommend Zinsser BIN primer (in a red can) prior to painting.
Step 3: Mount Your Units to the Wall
- If you are mounting your units with no baseboards: proceed with the pax instructions provided and use anchors and studs to mount the units
- If you are mounting your units with baseboards: you will need to use mollys of two different sizes/length. I think this video explains it better than I can over text.
Step 4: Cut and Install the Baseboards
Baseboards are what make everything look seamless. If you rush this part, it shows. So take your time.
Measure Carefully
- Measure the wall space where the baseboard will go.
- Measure from corner to corner, not just the unit width.
- Always measure twice before cutting! In fact, measure three times.
If you’re cutting a straight piece between two flat walls, that measurement is your cut length. If you’re cutting for a corner, you’ll need angled cuts.
Understand Your Corners
Most room corners are 90 degrees, which means you’ll cut each piece at 45 degrees so they fit together cleanly.
- Inside corner: angles cut inward
- Outside corner: angles cut outward
Dry fit ALL your pieces before nailing anything in. You may find that even if you measured well, things don’t fit quite perfectly and you may need to make small adjustments.
Using a Miter Box (Beginner/Budget Version)
If you don’t have a power miter saw, a basic miter box works perfectly. This is what I used when I did the baseboards for my condo and it worked perfect! You just need a little elbow grease.
- Place the baseboard into the miter box exactly how it will sit against the wall (don’t flip it upside down).
- Line up your pencil mark with the 45° guide slot.
- Hold the board firmly in place.
- Use steady, even strokes with your hand saw.
Let the saw do the work. Don’t force it.
Final Tips
After cutting:
- Test fit all pieces before installing.
- Sand the cut edge lightly if needed.
- Nail into studs when possible.
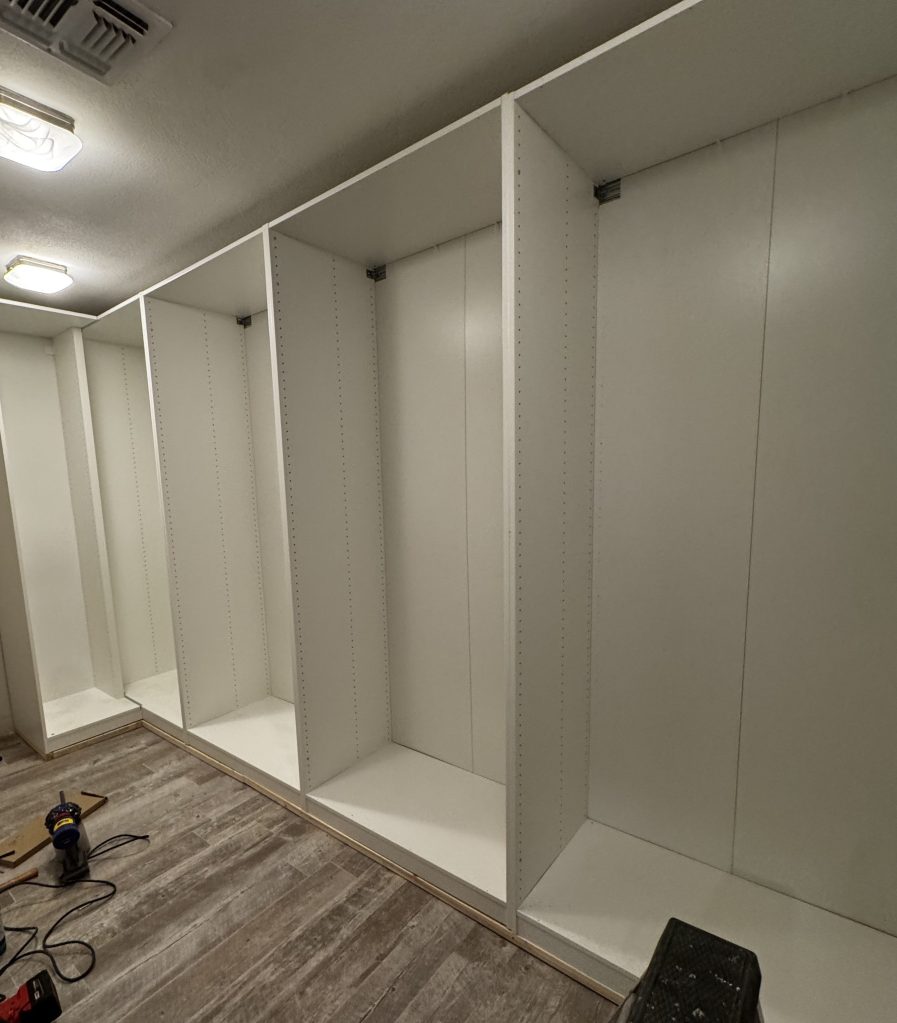
Step 5: Cut and Install the Upper Trim
Because the PAX units don’t sit flush with the ceiling, I needed something solid to attach the top trim to. You can’t just nail trim into thin IKEA particle board and expect it to hold.
So here’s what I did:
Step 1: Attach 2×2 Support Blocks
I cut small 2×2 wood pieces and secured them directly to the top of the PAX units. These act as anchor points.
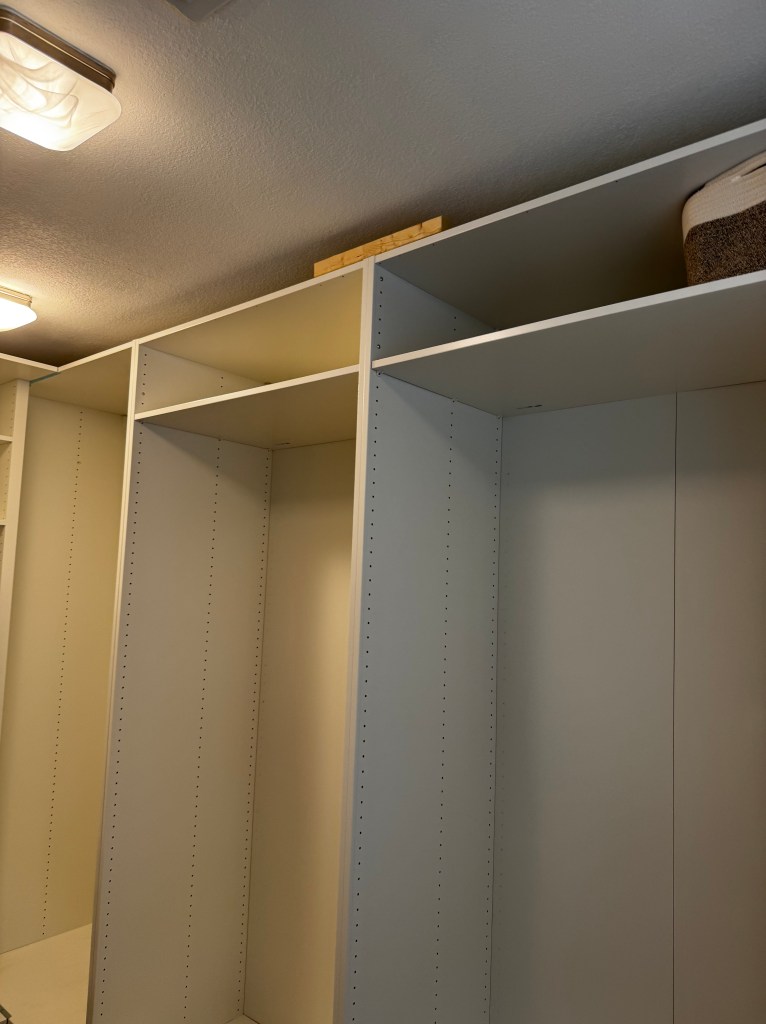
- Space them every 12–16 inches along the top.
- Secure them using wood screws or nail gun (I used the nail gun).
- Make sure they’re flush with the front edge of the unit so your trim sits flat later.
Think of these 2x2s as the “backbone” that your trim will attach to.
Step 2: Attach the Trim to the 2x2s
Once the support blocks were secured, I nailed the upper trim directly into the 2×2 pieces — not into the IKEA unit itself.
This gives the trim something solid to grab onto and keeps everything stable. You can see I used a piece of wood and clamps to hold the trim up while I was nailing it, since I was working alone.
Step 6. Install the Trim Between your Units
If your PAX units are installed side by side (like I did in my house), you’ll want to add 1.5” lattice moulding between each unit. This step makes a huge difference. It covers the visible seams between the units which makes the whole wall look like one solid built-in unit. If your units are not side by side, see below.
How to Install It
Step 1: Measure the Height
Measure from the very bottom of the unit (or base platform) to the top trim. Cut your lattice moulding to that exact height. And like with all other trim, always dry fit before attaching.
Step 2: Paint Before Installing
Paint the lattice pieces first. It’s much easier to get clean edges and full coverage before they’re attached. Let them dry completely before installing.
Step 3: Attach the Moulding
Line the lattice strip directly over the seam between two units. You can attach it using a brad nailer (preferred), or Liquid Nails if you don’t have a nailer. Make sure it’s straight before securing it fully.
If Your Units Are Spaced Apart (Like My Condo)
If you’re intentionally leaving space between your PAX units to stretch them across a full wall, the trim installation works a little differently. Instead of placing trim between the units, you’ll mount it in front of them to visually connect everything.
Step 1: Measure the Gap
Measure the exact distance between the two units.
Step 2: Choose the Right Trim Width
Purchase trim boards wide enough to cover the entire gap and/or overlap slightly onto each unit. This creates the illusion that the units are one continuous piece. The trim should sit flush against the front edges of the PAX frames.
Step 3: Cut and Attach
- Cut the trim to the full height of the units (base to top trim).
- Dry fit it first to make sure it covers the seam evenly.
- Attach using a brad nailer (preferred).
Hot Tip
Always check the “actual” measurements listed on the trim. A board labeled 1×4 is almost never actually 1 inch by 4 inches. It’s typically closer to ¾” x 3.5”. If you plan based on the name instead of the actual dimensions, your spacing can end up slightly off and even half an inch matters when you’re trying to make everything look seamless. Double-check before you buy, and definitely before you cut.

Step 7: Caulk and Touch-ups
Final Step: Caulk, Fill, and Touch Up
This is the step that makes everything look custom instead of DIY. Run caulk along all trim seams, where the trim meets the wall, along the baseboards, then fill every nail hole. Let it dry completely.
Once everything is dry lightly sand if necessary then touch up with paint. If you’re not adding decorative trim or crown moulding at the top, you’re officially done.
Stand back and admire your work!


Leave a comment